基于Github的源码白盒扫描工具Raptor
作者:admin | 时间:2016-9-13 12:55:33 | 分类:黑客工具 隐藏侧边栏展开侧边栏

Raptor(猛禽)是一款基于WEB界面的github源代码扫描器。你只需要给它一个Github repository的URL地址,它就能进行自动扫描。
简单介绍
你也可以在Raptor设置WEB监控机制,在每次进行提交或者合并分支时,它会收到消息然后进行自动化扫描。这些扫描工作是异步进行的,而且只有启动扫描的用户自己才能看到扫描结果。
Raptor的一些特性:
插件体系结构(新加入的插件能直接使用+生成统一报告)
WEB服务可以定时自动化运行(不需要去UI界面操作)
为新的漏洞或者编程语言,进行创建/编辑/删除签名的操作
笔者声明一下,这个项目是为了帮助社区和初创企业进行代码安全检测,可能不会有商业产品的那样的质量保证。此外,这个工具只是为了给代码审计和研发人员提供发现漏洞的切入点,所以请不要盲目信任工具输出的内容。当然,如果你将它加入CI/CD(持续集成和持续交付)的话,那应该会不错的。
在这里Raptor集成了一些插件。大家注意,为了兼容本框架,下面不少的工具/模块/库都是被改过的:
MozillaScanJS – 扫描JavaScript (主要是客户端的Node.JS等等, 未来会支持Chrome和Firefox插件)
Brakeman- 扫描Ruby Rails
RIPS - 扫描PHP
Manitree – 扫描 AndroidManifest.xml等等
规则包:
ActionScript – 扫描Flash/Flex(ActionScript 2.0 & 3.0)源
FindSecurityBugs (只含规则) – 扫描Java (J2EE, JSP, Android, Scala, Groovy等等)
gitrob – 扫描敏感数据的泄露(包含证书/配置/备份/私密设置的信息)
安装步骤
笔者安装时,在Ubuntu 14.04 x64 LAMP环境下测试通过,安装视频在这里。
	$ wget https://github.com/dpnishant/raptor/archive/master.zip -O raptor.zip


	$ unzip raptor.zip


	$ cd raptor-master


	$ sudo sh install.sh
使用方法
使用视频在这里。
	cd raptor-master


	sudo sh start.sh #starts the backendweb-service
然后你就可以访问本地的WEB服务了:
http://localhost/raptor/登陆
你可以用你在github服务器上注册的用户名来登陆,密码任意输入即可(但在查看扫描结果的时候,需要用到相应的用户名)。
比如,如果你在github.com上注册了账户foobar,你就需要用foobar这个账户名去扫描github.com上面的repos。
但是,如果你在私人的github服务器上注册了foobar_corp账户,比如:
https://github.corp.company.com/在这时,你就需要使用账户foobar_corp,去扫描github.corp.company.com服务器上的repos。
提醒一下大家,现在没有在demo版本中搞数据库,所以现在密码验证的地方可以随意输入。
规则编辑器
你可以使用系统自带的轻量级GUI规则编辑器,用它来加入新的规则。当然啦,你也可以使用其他文本编辑器,因为规则包文件只是普通的JSON文件。操作时只需要打开backend/rules下面的规则包,然后将修改/新增后的规则,保存在backend/rules目录下面即可。简单来说,你需要做的只有少量的编辑工作。注意,将新的规则包的文件名加入到这里,这里不要带上.rulepack的后缀,重启服务器后就大功告成啦。
你可以通过这里的URL地址直接访问规则编辑器:
http://localhost/raptor/editrules.php添加规则
ignore_list.rulepack:
你可以添加一些针对目录名/文件名的正则匹配,避免raptor去扫一些无用的文件如jquery.min.js,或者去深入扫描/test/这样的目录。在“插件”选项里,规则插件都放在rules目录下。Issue区域是规则包文件里提到的issue的ID: Example#1, Example#2。match_type区域的值可以是regex/start/end三个选项,value区域的值是为了配合match_type区域而填写的字符串,这里需要进行Base64编码以防出现JSON syntax语法错误。解释一下,match_type中的regex是基于正则的匹配,start会匹配字符串片段开头,end会匹配字符串片段结尾。
这是在扫描器扫描完issue后进行的,它会依次遍历发现的issue,然后去除其中(ignore_list.rulepack)里面匹配到的内容。
规则实例:
	{


	  "files": [


	    "/.",


	    "bootstrap",


	    "jquery",


	    "uglify",


	    "knockout",


	    "angular",


	    "backbone",


	    "ember",


	    "yui",


	    "mocha",


	    "express",


	    "yql",


	    "dataTables"


	  ],


	  "directories":[


	   "/node_modules/",


	    "/test/"


	  ],


	  "plugins": [


	    {


	      "name":"common",               <----- Name of the Plugin


	      "issue":"HARD_CRED1",          <----- ID of the issue


	     "patterns": [


	        {


	         "match_type": "start",       <----- Match type can be either"regex", "start" or "end"


	         "value": "foreach"           <----- The actual string tomatch. Base64 Encode this pattern if match_type is "regex"


	        },


	        {


	          "match_type": "start",


	         "value": "for"


	        },


	        {


	         "match_type": "start",


	         "value": "elseif"


	        }


	      ]


	    }


	  ]


	}
your_rule_name.rulepack:
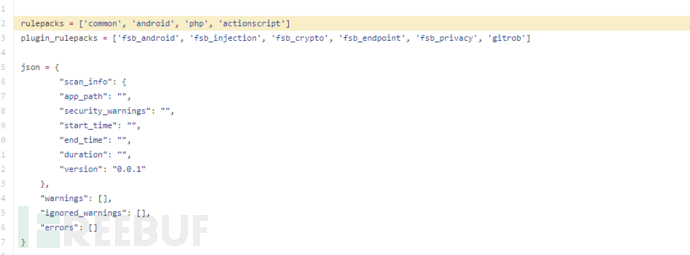
你自己可能也会创建一个新的规则包(rulepack)/扫描插件,然后将其加入扫描器框架。那么,下面笔者就简单介绍一下该规则包的JSON格式。
	{


	  "plugin_type":"plugin_name",   <-- Give ita name (any string)


	  "file_types":[


	   ".java",                     <-- Add as many file extensions, you would want the scanner to pickwhile scanning


	    ".js"


	  ],


	  "rules": [


	    {


	      "id":"HARD_CRED1",        <-- Aunique IssueID, be creative.


	     "severity": "High",        <-- This can be High, Medium or Low.This would accordingly show up in the graphs in UI.


	      "title":"Title of the Issue",   <--The title of the issue.


	     "description": "This text here shall be reflected in theUI as description of the issue.",       <-- The description of the issue, this is optional.


	     "remediation": "The text here shall be reflected in theUI as the steps to remediate the issue", <-- The remediation of the issue, this is optional.


	      "link":"Any URL that has more resources about the issue.",  <-- URL of the issue. This is optional


	     "example_insecure": "Put the insecure version of the codesnippet for learning purpose.",  <-- This is optional


	     "example_secure": "Put the secure version of the codesnippet for learning purpose.",      <-- This is optional


	     "platform_version": "all",    <-- Leave it like that


	      "enabled":"true",            <-- Thisvalue enables or disables the rule during the scan. It can be either"true" or "false".


	      "logic":"Explain the logic behind this rule for future updation orcustomization",     <-- This isoptional


	     "signature": "base64encode(regexp)"    <-- Write the Regular Expression of yourpattern and then base64encode it to put it here.


	    }


	  ]


	}
如果你想要更好地利用这个扫描器,并不仅仅将其作为一个正则匹配器,你可以写一个像这样的简单扫描插件,在这里整合脚本,并脚本加入规则插件列表中。我想,这对那些有着python基础的人是非常简单的。
*参考来源:github,FB小编dawner编译
